I have stumbled upon so much crazy-awesome nail art on Pinterest that it astounds me. I've added many a nail tutorial to my
"Try This Out" board on Pinterest and I FINALLY picked one to execute.
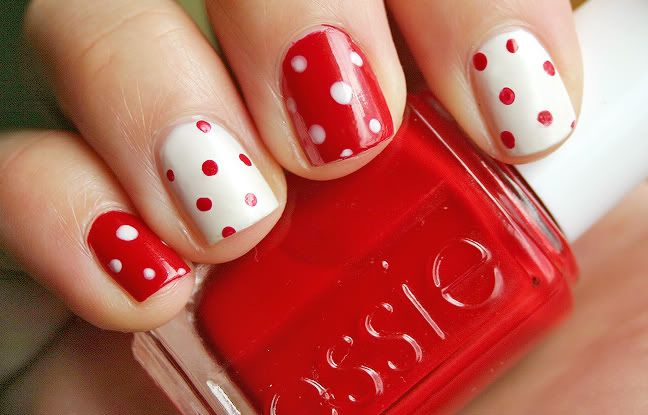
This time around, partially because it was my "virgin" attempt at creative nail art and partially because I simply don't have the most beautiful digits, you don't get pictures of MY hands. But honestly, they look pretty darn close to the image below from
The Dainty Squid. I used the same color Kaylah did:
Essie's "Sew Psyched." For the nude-ish base, I used
Essie's "Sand Tropez."
I will confess that I had to try this twice -- I am quite impatient and I didn't wait long enough for my "Sand Tropez" coat to dry before I put the
reinforcement ring stickers on and painted my half-moon "Sew Psyched." I ended up with a bit of the nail polish peeled off and a LOT of bubbles after I applied the top coat (though I can't quite explain the mechanics of that). So, I started over with some nail polish remover, applied two coats of "Sand Tropez" and a couple drops of
Nicole drying drops to each nail, and wait a full 24 hours before adding the "Sew Psyched."
Despite the hiccup in my first semi-failed attempt, the second time around worked pretty well! Like I said, they look just like Kaylah's (photo below).
Here's the original tutorial post; in Kaylah of
The Dainty Squid's words, "I'm a little tardy to the party with this whole using paper reinforcement sticker to make perfect little half moons thing." Better late than never, right?
Some other random yet critical (relatively speaking) pieces of advice I've gleaned in my new-found love of creative nail art:
- Scotch tape works better than other brands of tape (less residue and tacky-ness left over)
- Reinforcement ring stickers should be staged stuck to your skin before going on the nails to lessen the above-mentioned residue left behind on nails
- Drying drops are a well-manicured girl's best friend (though from personal experience they're not 100% fool-proof, i.e. they don't make it safe to pull on your jeans right away--you still gotta wait it out!)
- Confetti nails can be achieved with a nail dotter, which is also helpful for marbled nails -- using the nail dot tool seems easier to me than the whole polish-in-water marbling technique!
Here are a TON of other lovely ideas for you to run with. Let me know (and share results) if you try any of these!


No comments:
Post a Comment
I read every comment and THANK YOU for leaving one! ♥ If you have a question and would like a response, please be sure that your Blogger profile is linked to your e-mail, otherwise leave your e-mail address in your comment. Thanks again! ♥
Note: Only a member of this blog may post a comment.